Tuesday, April 26, 2011

The Barn House

I have been doing some design work for a client who wants a barn style house. In the process I have been looking at various images and have become increasingly impressed by the possibilities of this simple form. The straightforward lines a home of this style requires lead one to explore siding and window placements that are anything but boring. Below are some images I particularly enjoy.


Modern_barn_house

barn-home-falmouth

Looking at all these cool homes, I said to Jence "What about using a vertical siding on the exterior of our house?" He just about fell off the ladder he was standing on and gave me a skeptical look. Our current plan is to use a wide exposure rough pine clapboard, and I imagine we will stick with that plan.

Thursday, April 7, 2011

Saturday, January 29, 2011

Enclosure

Since timber frames are load bearing structures in themselves, there are many options for insulation beyond 2x walls with fiberglass or foam between the studs. Ideally you utilize a system that doesn’t involve the redundancy of another load bearing wall attached to the timber frame. We often install panels on timber frames we build, but wanted to explore other methods in our own house. Our plan was to build double stud walls and then blow in cellulose for insulation. This would allow us to use a recycled product to create a wall with a high r-value. Building our own insulation system would also mean using our labor, rather than paying the panel company to pre-build and cut the panels. In the end however, it seemed like we might never have walls if we didn’t go the panel route—so that is what we did and thirteen days after the panels arrived we had a weather tight structure. It is still a thrill for me to pull in the driveway and see a building with windows, but I imagine it is only a matter of time before the beauty of black felt paper and orange cap nails wears thin and I yearn for siding and a porch.


Monday, December 13, 2010

Lights

In planning this house, I spent many hours working on making the spaces flow together and on determining the size and location of the windows. I have not thought very much along the way about the lighting that will go into those spaces.

In a timber frame that is insulated with panels, the lighting has to be planned earlier in the process than in a conventionally framed house. There are minimal places in which to hide wires and no wall or roof cavities. As a result, on a very cold recent evening we found ourselves laying out future hanging lights on the sawdust covered floor and using a laser to project the location onto the ceiling. Holes were then drilled up through the roof panels and spaces for electrical boxes chiseled out of the roof decking. Before we could do the final step to get the roof weather tight we ran wires over the roof panels for every ceiling light that will hang from the roof. In this house it was the lights in the bedrooms and in the entry and stair areas.

In my efforts to rapidly educate myself about lighting placement and options, I have learned that there are basically three types of lighting that one should think about- general, task and accent. Also, in a house with an open floor plan, such as this one, it is possible to differentiate the spaces through creating unique lighting scenarios is each.

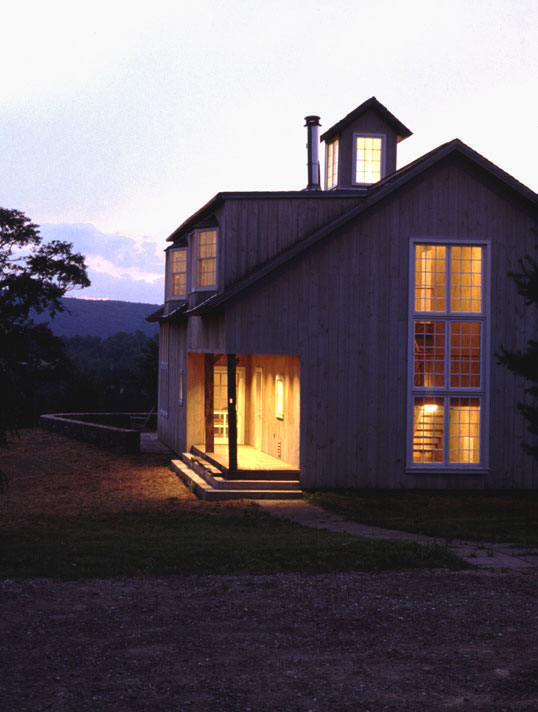
Since we used rough sawn lumber that is somewhat weathered in places, I am going to go with a theme of utilitarian light fixtures throughout the house. These barn inspired fixtures seem to be quite popular right now and are prevalent on Amazon and at Ikea. I am hoping they will contrast well with the wood frame and floors and the plaster covered walls. And while lighting placement will be tricky to change, the fixtures themselves can be swapped out easily to create an entirely different look.

Wednesday, November 24, 2010

Finally...


Well, you know what they say about the cobbler’s children…

Each warm and sunny summer month came and went without making any progress on our house. We did, however, raise two other peoples’ house frames and a large barn. We also built custom cabinets for a big kitchen, as well as completed a number of smaller projects. The tarp covering our foundation became tattered and I really wondered if we would put our own timber frame up before there was snow on the ground. Then last Thursday, a week before Thanksgiving, the crane was on site and we managed to raise the whole frame in a day.

And now the panels and windows are ordered and when they are installed we will have an enclosed, weather tight structure. We are using structural panels on the walls and nail base panels over tongue and groove decking on the roof. The panels will arrive precut for our house frame with window and door openings already in place.

This slightly euphoric state, right after the timber frame goes up, is one that we are well acquainted with in homeowners. After months of seeing the plan on paper only, it is finally a three dimensional reality. While it is a great joy to pull into the driveway and see our future house rising above the foundation, I am incredibly daunted by the many layers that lie ahead. Sure, if we had lots of money to throw at the project it would get done in a timely manner, but this is after all an experiment in doing more with less and we will see it through to the end, even if it means a few months living in the basement.

Friday, April 16, 2010

The Mod

It is somewhat typical in this region of the country to move into the basement before the house is complete. I am just not excited about the idea of living in an underground concrete space that is most likely half filled with construction tools and debris. So, since it is April and we have been too busy with other people's projects to concentate on our own house, I took it upon myself to experiment with small space building and living. There is a movement in some corners of this country toward tiny houses, evidenced by the website http://www.tinyhouseblog.com/.

I set out to design a tiny house that is constructed from modular units no larger than 8'-0"x 8'-0". I came up with an 8'-0"x 14'-0" floorplan with a 6'-0"x 8'-0" loft over the kitchen area. I pre-built the walls, floor system and roof parts in the shop. By using 2x3's for the framing lumber I saved on weight and cost. One of my goals was to utilize as many materials as possible that were kicking around the shop and to scavenge other materials where possible. I found some awesome used wood windows at the Building Materials Exchange in Lisbon that I painted and retrimmed out in my chosen color scheme.
After recruiting a few friends to help carry the pieces out to the site, I and one other person assembled the building ourselves. We then ran an extension cord from the basement to the "mod" --modern and modular-- and now have electricity. I am in the process of refining the interior- creating built-ins, looking for a tiny wood stove and a small propane cooking stove. Once we have these and add running water and a fridge to the basement, it will be a very nice living experience.


Wednesday, March 17, 2010

Drawings


While the house is still a pile of timbers in front of the shop, I have finally chosen the windows, which for me feels like a big step forward. After looking into various options for wood interior and exterior windows, we are going to go with Marvin Integrity windows. The interiors of the Integrity windows are wood, while the outsides are pultruded fiberglass. While I still like the idea of stained wood on the exterior, the price point is a little high and I think fully wood windows could be a negative for a future owner of the house due to the upkeep wood requires. We looked closely at a Canadian window manufacturer called Norwood, but while I really liked them, it seems prudent to go with a clad window.
I would like to de-emphasize the non-glazing parts of the window so I think going with the dark brownish exterior finish called "bronze" will blend well with the stained pine clapboards.